Create and deploy React JS app for free
- Introduction
- What is a react JS app ?
- The hosting solution
- Why this method is better than others (a must read)
- What you will need
- Steps
- 1. Create Gitlab repo
- 2. Clone the repo to your local machine
- 3. Create react JS app and change
.gitignoreandpackage.jsonfiles - 4. Build the app
- 5. Create .gitlab-ci.yml file for CI/CD
- 6. Move all react app files to root directory
- 7. Push files to Gitlab
- 8. Check out pipelines and jobs
- 9. Change Gitlab Pages Visibility
- 10. Preview your app
- Advantages of this hosting method
Introduction
You probably want to create your own ReactJS application, and host it somewhere on a cloud-based solution afterwards. Depending on your final needs, there are a lot of app-hosting platforms like Vercel, Heroku, Netlify and so on. But today, let me prove you that Gitlab is also a great React JS app hosting platform.
What is a react JS app ?
A react JS app is a user-friendly web-based application where everything is pretty much fast to load.
1. User-friendly
It doesn’t matter the device, the resolution, the browser, or even the internet provider : the inner app features will always work properly, even if it may not look the same.
2. Web-based
React framework renders HTML components, using Javascript. The final outputs are HTML, CSS and JS files. The main advantage is that a react JS app is a Progressive Web App (PWA) that is installable as a native app, just by adding it at user’s home screen.
3. Fast to load
A react JS app only re-renders relevant components on each user’s actions, instead of reloading the whole html document like a basic webpage.
The hosting solution
As stated at the introduction, we will use Gitlab as our web-hosting solution. You can check out what Gitlab is and why I have chosen it in my Github vs Gitlab article.
Basically, we will use Gitlab to handle 3 processes :
Why this method is better than others (a must read)
I have seen a lot of solutions using Gitlab CI/CD (here, here, and even in Gitlab docs itself here), but the main problem is this : they all build the app on Gitlab runners, which consumes a lot your monthly CI/CD quotas (400 minutes/month in August 2022), especially if you push your code frequently like me.
For example, my quota almost run out because of a react JS app that consumed a half of it in less than 1 week of code :

The following solution is to build the app locally, and to deploy the already built app remotely. That consumes 9x less than common solutions that I have found (20 seconds VS 3 minutes on average).
You can check out more advantages of this method down below.
What you will need
This article assumes that you :
- already have a Gitlab account
- installed git CLI in your machine
- installed npm in your machine
- are familiar to creating and developping a React JS app
Let’s dive into it !
Steps
1. Create Gitlab repo
Go to Gitlab and create a new blank project : 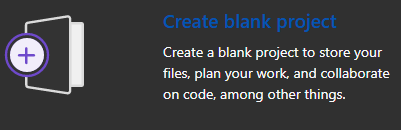
Set the Project name, Visibility Level, Project Configuration to whatever you want. Just make sure that Project deployment target is optionally set to Gitlab Pages, and do not change Project slug : 
2. Clone the repo to your local machine
Open your git CLI from any folder, and clone the project that you’ve just created.
git clone https://gitlab.com/yourusername/nameofyourproject.git
cd nameofyourproject
To link your local machine to your Gitlab account, check out this dedicated article
3. Create react JS app and change .gitignore and package.json files
a) App creation
Now that you are in the repo folder, you can init your react app by using the following git command, where apps is the name of my app :
npx create-react-app appsLet it run until you have this message : 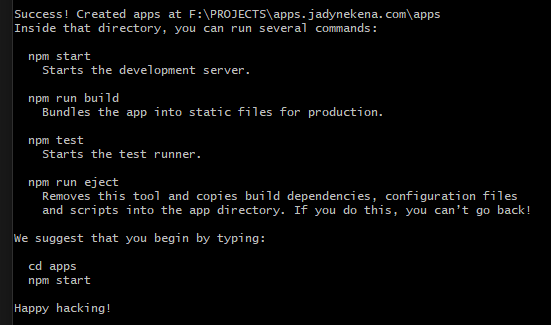
b) Files to change
.gitignore
Open the app folder with cd apps command in git CLI.
Edit the .gitignore by deleting or commenting the /build line : 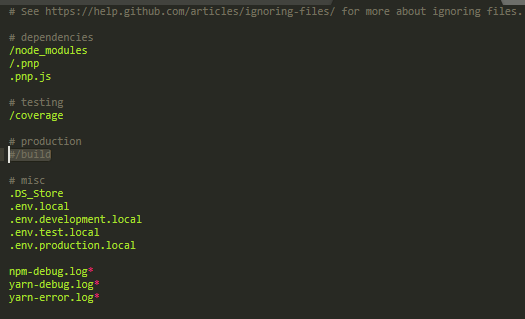
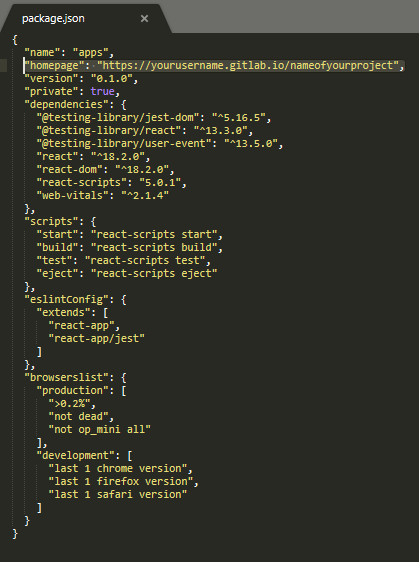
package.json
Now change the package.json file by adding the following key-value pair:
{
...
"homepage": "https://yourusername.gitlab.io/nameofyourproject"
...
}
Your package.json file should now look like this.
4. Build the app
Build the app with the following commands :
npm run buildOptional step : run
npm run startto see your app in dev mode before runningnpm run build. This will open http://localhost:3000 in your default browser.
You will afterwards see a new folder named build in your apps directory. 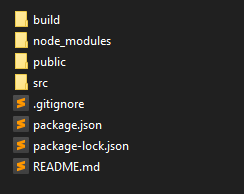
5. Create .gitlab-ci.yml file for CI/CD
In apps directory (i.e the folder where the package.json file belongs to), add the following content to a file named .gitlab-ci.yml :
pages:
  image: alpine:latest
  stage: deploy
  variables:
    GIT_STRATEGY: clone        # Do clone git repo
  script:
    - rm -rf public
    - cp build/index.html build/404.html # only one page for the app
    - mv build public         # Rename the CRA `build` folder to `public`
  artifacts:
    paths:
      - public
In summary
This file must be the most important part of this article. Gitlab needs this .gitlab-ci.yml file to handle the CI/CD of your project. Once this file exists in the root of your repo, Gitlab opens a runner that will execute the config file step by step.
In details
pages:the job name that will be executed. The specific job name pages is innerly recognized by Gitlab as a step before Gitlab Pages Deployment.image: alpine:latestGitlab runner uses a Docker image of a small linux OS. It’s like turning on the computer with always the latest version of the OS.stage: deployit specifies thatdeployjob depends on the current one, so there will be no Gitlab Pages Deployment as long as the current one is not done.GIT_STRATEGY: clonethe Gitlab runner clones the whole current repo into its own just created environment. It’s like what you’ve just done before.script:everything under this block is what is runned on Gitlab runner. The script content in our file does the following steps :rm -rf public: deletes public folder (with forcing)cp build/index.html build/404.html: makes a copy ofindex.htmlfile into404.htmlfile so that any other route that final user enters is fakely redirected toindex.htmlmv build public: renamebuildfolder topublic. Gitlab Pages needs a folder namedpublicto identify the files that it will need to serve.
6. Move all react app files to root directory
You can move all files manually, or via terminal from your apps folder as follows :
cd ..
mv apps/* .
mv apps/.gitignore .gitignore
mv apps/.gitlab-ci.yml .gitlab-ci.yml
rm -rf apps
Make sure to :
- turn off your local server before proceeding
- close all related terminal before proceeding
- move ALL files, including
.gitignoreand.gitlab-ci.yml - delete
appsfolder, as it is now empty we don’t need it anymore.
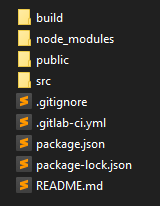
Now your local repo nameofyourproject should look like this :
7. Push files to Gitlab
Back to your terminal, let’s push it to gitlab.
git add .
git commit -m "first react app on gitlab pages"
git push
To link your local machine to your Gitlab account, check out this dedicated article
8. Check out pipelines and jobs
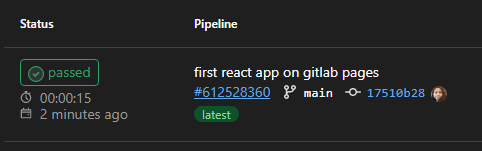
Now go to your Gitlab pipelines : https://gitlab.com/yourusername/nameofyourproject/-/pipelines and see the current pipeline running :

Once done, it will look like this :
9. Change Gitlab Pages Visibility
Your app is almost ready, hang on a little longer !
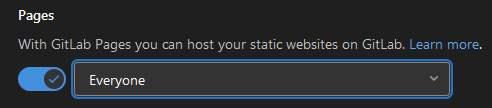
To make your website publicly available, navigate to your project’s Settings > General > Visibility and select Everyone in pages section. Don't forget to save changes.
10. Preview your app
Go to your project homepage https://yourusername.gitlab.io/nameofyourproject/ and let the magic happen ! 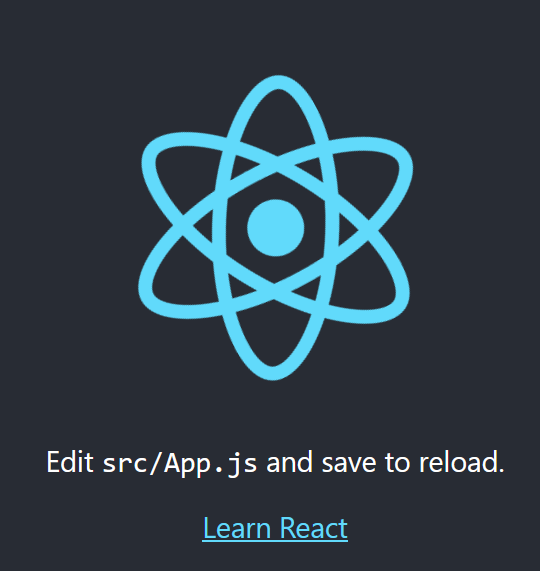
Advantages of this hosting method
1. Very low CI/CD minutes consumed
As stated before, this method is up to 9x faster than building the app in Gitlab runners directly.
2. Privacy
You can keep your code private and still have your React JS app accessible to public, unlike Github that needs a Pro plan to do so.
3. Custom domain
Gitlab Pages can handle custom domains to your app, that you will have to specify in homepage value of the package.json file.
4. Free and highly available
Gitlab free plan is suitable for any small and medium react JS projects. Gitlab only requires your repo to be less than 10GB, which is way larger than what you will need to make a great react JS app. No need to pay to make your app work and available more than 99% of times.
5. Customizable and easy to maintain
Everytime you deploy a new version of your app, Gitlab runs automatically the config file. You can also configure your .gitlab-ci.yml file to deploy pages only manually for example. Afterwards, all you need to do is to monitor and check that everything works fine !
Any thoughts on this method 🤔 ? Feel free to comment or to ping me on Twitter (blog one or personal one) !